5 minutes
Docker Containers in Infix
Docker on your switch/router? Yes!
A network operating system for switches and routers, that runs Docker?
Yes, as of Infix v24.02 support for running containers using podman is supported. Because networking is a first class citizen in Infix, you can set up quite advanced virtual topologies with containers. This blog post is the first in a series of posts that aims to show this.
Note: this post assumes knowledge and familiarity with the Infix Network Operating System. Ensure you have a network connection to your Infix system and can log in to it using SSH. For help, see the networking documentation.
Introduction
All configuration of networking and containers is done through the CLI:
admin@infix:~$ cli
Notice the slight change in the prompt. Return to the Bash shell using
exitor Ctrl-D from the “admin-exec” top level of the CLI.
Networking Basics

Infix networking, click image for more information.
In Infix all network access has to be set up explicitly, so there is no default container networking setup (it’s a security thing). There are two types available to choose from:
host: Ethernet interfacebridge: Masquerading bridge
The first can be any physical port/interface which is handed over to the container or, more commonly, one end of a VETH pair.
The latter type is usually available as docker0, or podman0, on your
host system. These bridges are managed by the container runtime, in the
case of Infix this is podman. When a container is set to a container
bridge network, a VETH pair is automatically created when the container
is started – one end is attached to the bridge and the other connected
to the container as a regular interface.
Here’s how you create a container bridge:
admin@infix:/> configure
admin@infix:/config> edit interface docker0
admin@infix:/config/interface/docker0> set container-network
admin@infix:/config/interface/docker0> leave
Web Server Container

Now, time for a basic web server example. For our first container we’ll be using docker://nginx:alpine. It’s a relatively small container with the Nginx web server built on top of the Alpine Linux image.
admin@infix:/> configure
admin@infix:/config> edit container web
admin@infix:/config/container/web/> set image docker://nginx:alpine
admin@infix:/config/container/web/> edit network
admin@infix:/config/container/web/network/> set interface docker0
admin@infix:/config/container/web/network/> set publish 8080:80
admin@infix:/config/container/web/network/> leave
Issuing the command leave queues a job to download the image and
create a container in the background. To see the progress:
admin@infix:/> show log container
or just poll the status command:
admin@infix:/> show container
CONTAINER ID  IMAGE                           COMMAND               CREATED         STATUS         PORTS               NAMES
c60a6deeea4e  docker.io/library/nginx:alpine  nginx -g daemon o...  2 minutes ago   Up 2 minutes   0.0.0.0:8080->80/tcp  web
You should now be able to access the web server on port 8080 of the host’s IP address.
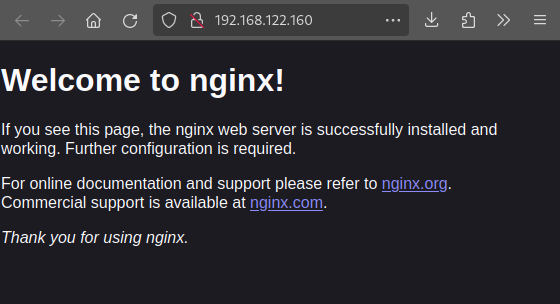
Nginx welcome screen.
Customizing Content
Deceivingly enough, Docker containers have a thin writable layer that allows changing just about any file in the image. The big HOWEVER though is that this layer doesn’t survive configuration changes or, most importantly, image upgrades.
Use Volumes!
Volumes are a specialized type of “mount”, for people familiar with UNIX systems. Infix currently supports named mounts that provide a persistent writable layer for containers. Here’s how to add one to your container:
admin@infix:/> configure
admin@infix:/config/> edit container web
admin@infix:/config/container/web/> edit volume content
admin@infix:/config/container/web/volume/content/> set target /usr/share/nginx/html
admin@infix:/config/container/web/volume/content/> leave
Named volumes have the downside of being opaque to the host, so the
easiest is to upload the content using scp or editing it directly
in the container:
admin@infix:/> container shell web
d95ce9f7674d:/# vi /usr/share/nginx/html/
50x.html    index.html
d95ce9f7674d:/# vi /usr/share/nginx/html/index.html
... edit, save & exit from vi ...
d95ce9f7674d:/#
Container Content in Device Configuration
Save the best for last? A neat feature is that container content can be
saved in the system’s startup-config and therefore be automatically be
backed up by administrators snapshotting the system.
This also means that custom(er) builds of Infix can bundle a built-in container’s initial configuration in the Infix
factory-config, which can be very useful when deploying at new installations.
This feature is perfectly suited for container applications that need a
specific site setup. For example a configuration file. Here we use the
same container image to bundle an index.html file:
admin@infix:/> configure
admin@infix:/config/> edit container web
admin@infix:/config/container/web/> edit mount index.html
admin@infix:/config/container/web/mount/index.html/> set target /usr/share/nginx/html/index.html
admin@infix:/config/container/web/mount/index.html/> text-editor content
The content setting is an alternative to source for file mounts
which allows providing the contents through the device’s configuration.
The
text-editorcommand can be changed in thesystemconfiguration context, but by default it starts a Micro Emacs clone, Mg.
Paste in this:
<!DOCTYPE html>
<html>
<head>
<title>Welcome to Infix!</title>
<style>
html { color-scheme: light dark; }
body { width: 35em; margin: 0 auto;
font-family: Tahoma, Verdana, Arial, sans-serif; }
</style>
</head>
<body>
<h1>Welcome to Infix the Network Operating System!</h1>
<p>If you see this page, the nginx web server container has been
installed and is working.</p>

<p>For online documentation and support please refer to the
<a href="https://kernelkit.github.io/">Infix Homepage</a>.<br/>

Commercial support and customer adaptations are available from
<a href="https://addiva.se/electronics">Addiva Elektronik AB</a>.</p>

<p><em>Thank you for reading this blog post!</em></p>
</body>
</html>
Save and exit with the usual Emacs salute: C-x C-x (Ctrl-X Ctrl-c, or hold down Ctrl while tapping X and c).
Leave configuration context to activate your changes:
admin@infix:/config/container/web/mount/index.html/> leave
Reload your browser to see the change.
Fin
That’s the end of the first post about containers in Infix. As usual, remember to
admin@infix:/> copy running-config startup-config
Take care! <3